How to Add Custom Domain Name
You can add a custom domain name from your Dokan Cloud dashboard. The process is straightforward and you can easily configure it.
We are going to show you how.
**Important Note: **Any existing AAAA (IPv6) DNS records should be removed before adding our DNS record.
Steps to Add Custom Domain Name
There are two ways to add your custom domain name. Either-
- Using cPanel
- Using your Hosting dashboard.
If you want to use your Hosting dashboard, you should contact your hosting company for proper guidance. As different hosting company has different kinds of dashboards it isn't easy to show them all. Also, if you have purchased the domain from a different company and hosting from another company, then the procedure becomes more complicated. So it is smart to approach your hosting company for guidance.
*Note*: If a user maps a domain without *WWW*, they must add the same *apex domain* (example.com) in Dokan Cloud. If they map their domain with *WWW*, they need to add the *WWW version* ( www.example.com) instead. Since Dokan Cloud allows only one custom domain, users should ensure they add the correct version based on their DNS settings.
*We will show you how to add a custom domain name using cPanel.*
Login to your Dokan cloud dashboard and go to *General--> Settings--> Domain*. There click on the *Add Custom Domain Name* button.

You will get a pop-up. In the pop-up you need to add the custom domain name and click on the *Save* button.
*Note*: You can also select to add the WWW version, that way, if anyone clicks on your website with WWW included, then it will be redirected to your website and vice-versa.

If you add any domain that is not registered anywhere, then you will see a message like this-

You will see that the domain is added but it is pending verification. That's because you haven't added the CNAME to your cPanel. So, copy the CNAME. Or you can add A record as well-

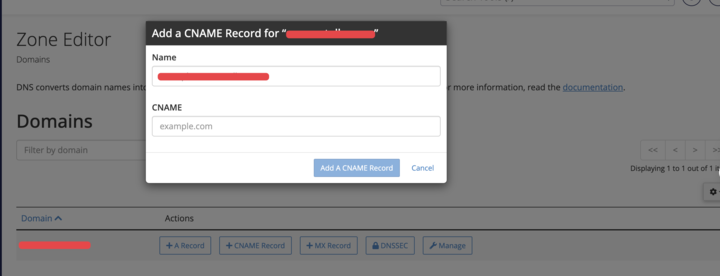
Now, login to your cPanel using your login credentials and find the *Zone Editor* under domains.

On the next page, click on the *CNAME Record* button.
*Note*: If you are adding the main domain then you can configure CNAME Record or Manage. But the safe option is configuring the Manage option.

Give a domain name, and add the CNAME that you have previously copied in the pop-up-

After adding the CNAME, you are done.
*Note:* It may take a few hours for the verification process to complete. So, wait for some time. But if it isn't verified after a few hours, please contact our support team.
But if the domain name is unavailable in the Domain List, you need to add the domain name by clicking on the CNAME record.
If the domain name is available in the Domain list, then you need to add the domain name by clicking on the Manage option. Choose CNAME as Type from the dropdown menu, in the Record section type:cname.ondokan.com.
In the name section type "@", if it gives you an invalid result, then add your domain name there (example: mysite.com.) instead of "@". Then click on the Save record button to finish.

Adding Custom Domain Name Procedure in the Cloudflare
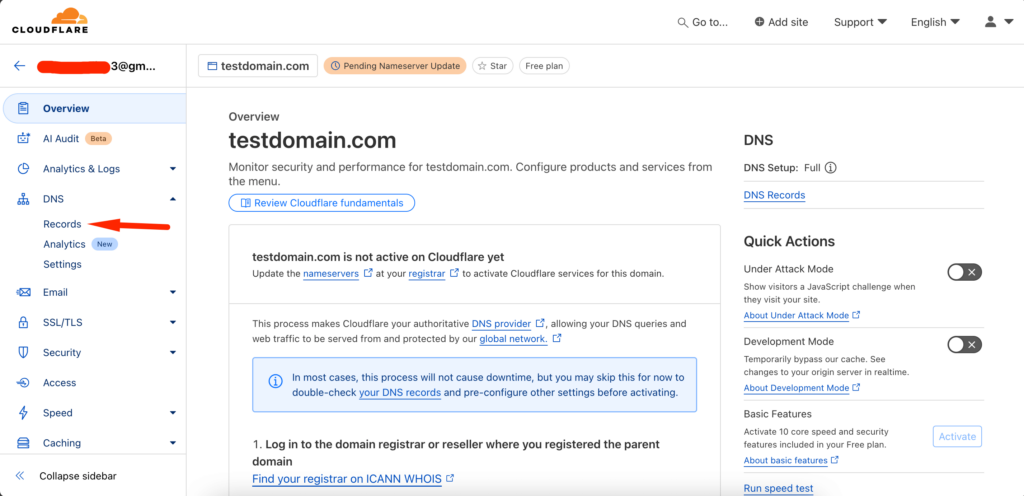
If you are using Cloudflare, then you need to follow the below steps.
Click on the domain name, then from the DNS option choose Records-
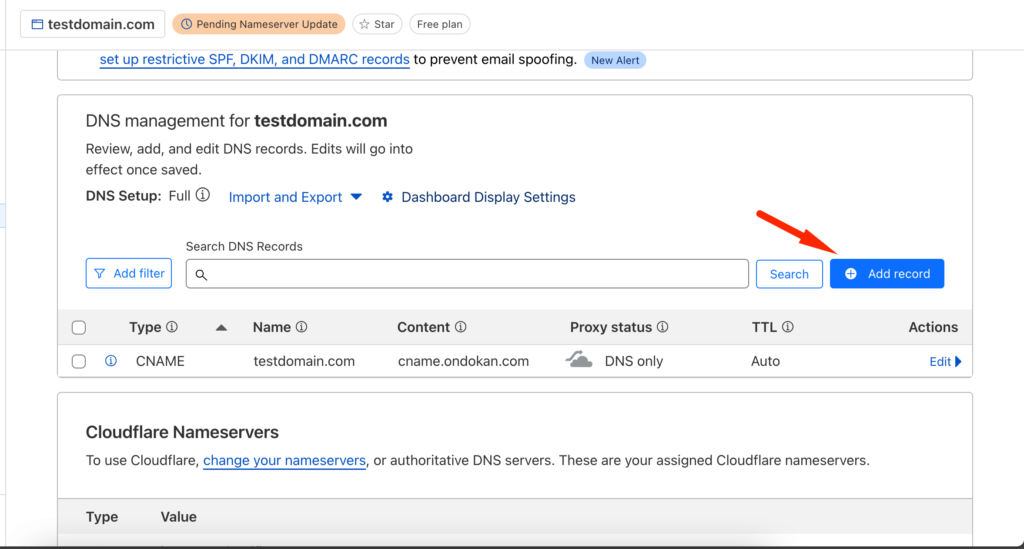
In the next page, click on the Add Record button-
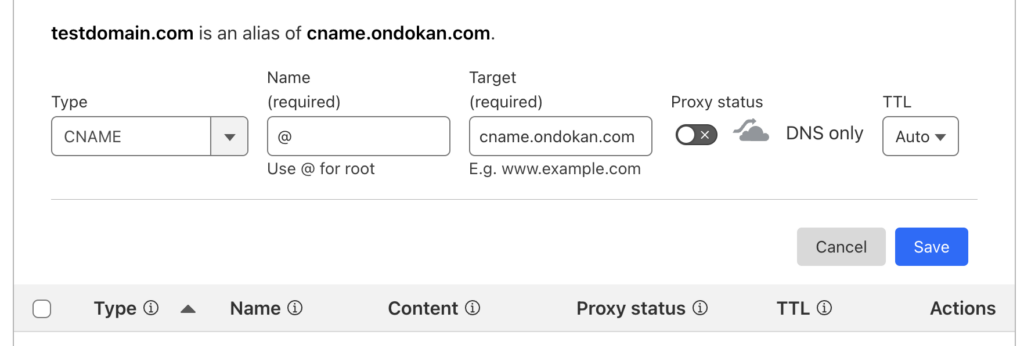
Now, choose type as CNAME from the dropdown, use @, then add target "cname.ondokan.com", disable proxy status, and save the changes. You are done.
Adding Custom Domain using Namecheap
To add you custom domain name using Namecheap, login to your Namecheap account and click on the Manage button-

Next click on the Advanced DNS and then click on Add New record-

Then, you can add the CName or A record from the dropdown-

Then after verification, you will need to click on the Refresh button and the domain will be verified.
Adding Custom Domain using Hostinger
To connect your account using hostinger,
- Log in to your Hostinger account.
- Click *Domains* > *Domains portfolio*.
- Click *Manage* for the domain that you want to connect to Dokan Cloud.

Then click on the DNS Nameservers -

locate your *A* record, and then click *Edit*. Then add the necessary information-

Click on update to finish.

Locate the *CNAME* record that has the name ` `www ``, and then click *Edit*.

This is how you can connect your Hostinger domain to Dokan Cloud.
Последнее изменение: 25/02/2026
Спасибо!